
Throughout this project there have been times when I have loved and hated making a tutu but overall I think I have completed it quite successfully. I have learnt an amazing amount of new skills which will be extremely useful in the future and will take my making skills to the next level. It has been interesting working more individually and not being spoon fed the instructions on how to make a costume, at times it was hard but looking at my completed costume now it makes me feel proud knowing that I have achieved what I wanted at the beginning of this project.
I liked having the workshops at the start of each week because I knew exactly what I had to achieve by the next workshop. This helped me keep on top of everything and plan out my time management much more effectively because I would set a to do list at the start of the week and I generally stuck to this. Without these tutorials I would not of been able to complete my tutu, although I think we had enough tutorials it would of been helpful to have a tutor around more frequently in case I was unsure of what to do or to double check something. Due to this there were a couple of times when something had to be re-done because I had gone ahead to complete it but it was wrong, for example the bodice looking wrinkled. I think I was more hesitant to just go ahead with a task because I was making something completely new and wanted to do it the correct way.
During most of my projects I have made a time plan but not to the extent that I had for this one, I found this extremely useful because I could keep referring back to it to keep me on track. I also made weekly timeplans which were useful because I could see whether I was going to have to speed up my pace or have time to relax. I also put in time off which I have never done before and this had a massive effect on how I worked on this project. I found that I was a lot more relaxed and enjoyed making my costume because I did not get stressed. I will definitely make a more specific time plan for my future projects and make sure I have time off because it was very successful.
Surprisingly I really enjoyed pleating and making the tutu, although it was quite repetitive I found it enjoyable because I did not do it all in one go, I spread it out effectively. If I have enough time in future projects I will defiantly do this for tasks that are repetitive because I am really happy with how I did my pleating because it is all neat. I also enjoyed putting on the surface decoration because again I took time to make it perfect and feel that I achieved this well and it does look effective.
There were certain parts of this project that I didn’t particularly enjoy, for example putting the hooping into the tutu was frustrating because at first I didn’t understand how to make it lay flat, but with practice and now that I know how it works I think I wouldn’t find it as bad. I also found sewing the bodice to the tutu really difficult just because it was so fiddly and such a big costume to work around. Although I am happy with my costume I am not completely happy with the tutu and how it lays when worn, it still doesn’t look as flat at the others. I think this could partly be because it is the biggest tutu and therefore there is more weight pulling it down, but because I have never made a tutu before I don’t fully understand how to make it flatter. I have put more strings in which pulls it flat but it still is not as flat as I want. I think with more practice I would get better at stringing the tutu and with some more assistance I would have more of an understanding.
I feel that the fitting went considerable well seeing as on the day I found out that my dancer had changed. Obviously I had a lot of changes which put me behind slightly but I just worked quicker and put more hours in to get back to the same level as the rest of my group. It was interesting working with a client and I learnt a lot from this, travelling around London with my tutu was a task in itself. I have found that when working for a client every part of the costume has to be perfect, if a mistake is made you have to go back and start again. It taught me that you have to work around them and even though our fitting was a week before hand in I have shown myself that I can complete it if I set myself the right time plan and put the hours in. I will remember this for the future and prepare myself for having to work around the client and having to alter time plans if I need to.
After finishing my tutu I think that I would like to go into dancewear, maybe not specifically ballet but some form of dance. Although I did enjoy making the tutu, I don’t know if I could do it as a profession now that I have completed it I feel I need a break so doing it day in day out I think I would find stressful. I know now to prepare myself and make a time plan, and to give myself a sufficient amount of breaks so that I don’t stressed or bored. After making this tutu for a client I feel that I will be more precise with my work and try to make it as neat as possible. I have learnt a massive amount of new skills which a very specific and will be extremely useful to me in the future especially if I want to go into dancewear. I have enjoyed working more independently and it has showed me that I am prepared for my final year and that I can achieve what I put my mind to. Overall I am happy with the outcome of this project and have enjoyed it.
Sunday, 16 May 2010
Friday, 14 May 2010
Attaching the Bodice and Tutu

I found sewing the bodice to the tutu extremely time consuming and the most difficult task throughout the whole project, this was because it was so awkward trying to work around the tutu and make it look neat. I had to sew through the gap between the piping and the bodice and along the edge of the binding on the basque, as well as all this I had to make sure that it was laying straight and that the CF and CB's matched. I think with more practice I could definately get better at doing this but I know that I did this to the best quality that I could of done.
I also had to put swing catches on the basque to the bodice. When I completed these I noticed that the bodice is not laying as straight as I would of liked but after I had spent so long sewing the bodice and tutu together I thought that I would be wasting time taking it apart and re-doing it. It is not that noticable and when worn it does look straighter.

Finishing the Tutu
Before I could do the finishings on my tutu I had to alter the basque and waistband so I had to then sew the netting and plate on again which was very time consuming. To finish the netting I had to use a very small zig zag stitch to create a satin stitch on the edge. I found this really difficult and I think this shows on the tutu. I think I should of practiced this more before doing it on my tutu because I think it is really untidy but it would of looked worse if I had unpicked it and started again. This is something I can think about for the future because sometimes I do rush into doing a task when I should practice to make sure I can do it perfectly and it doesn't take that much more time.
I had to put a facing onto the plate before sewing it to the tutu, I found this really hard again because of the fabric being so thick and in places found it impossible to fold the placket under and for it to stay in place. If I had more time I would of started again with the facing and if i had more fabric but due to these issues I had to leave the facing as it is.
I needed to put a placket on the plate for the fastening, when I first did this I sewed it to the basque wrong so it made the plate CB wonky in comparison to the tutu CB, so I had to take the whole plate of again and change the placket. Once I had made sure that I sewed the right side down I could then sew the plate back on, this had a big effect on my time because this was a very time consuming task. For the future I need to ensure that everything is lying right before sewing it down properly.

Lastly I then stitched the bias binding to the top of the plate and sew this to the basque to finish off the tutu and hide the rough edges. I reaslised that this would of been alot easier to sew it to the plate before sewing it to the tutu, I felt that thinking this shows that I am starting to learn on my own which this whole project was about, noticing little things like this will save me alot of time.
.
I had to put a facing onto the plate before sewing it to the tutu, I found this really hard again because of the fabric being so thick and in places found it impossible to fold the placket under and for it to stay in place. If I had more time I would of started again with the facing and if i had more fabric but due to these issues I had to leave the facing as it is.

I needed to put a placket on the plate for the fastening, when I first did this I sewed it to the basque wrong so it made the plate CB wonky in comparison to the tutu CB, so I had to take the whole plate of again and change the placket. Once I had made sure that I sewed the right side down I could then sew the plate back on, this had a big effect on my time because this was a very time consuming task. For the future I need to ensure that everything is lying right before sewing it down properly.

Lastly I then stitched the bias binding to the top of the plate and sew this to the basque to finish off the tutu and hide the rough edges. I reaslised that this would of been alot easier to sew it to the plate before sewing it to the tutu, I felt that thinking this shows that I am starting to learn on my own which this whole project was about, noticing little things like this will save me alot of time.
.

Thursday, 13 May 2010
Finishing the Bodice

After altering the bodice I then had to do the finishings. The top and bottom edges needed piping and we decided that the armholes were not going to have sleeves so needed a concealed binding. I found these finishes on the bodice quite difficult because the layers of fabric were so thick.
The left side of the bodice needed a placket for the fastenings and it was at this point that I realised I had not left a 5cm seam allowance when cutting my pattern pieces out. Because of this I had to cut a facing out and sew it to the centre back, and luckily I had enough fabric left over. It is little mistakes like this that I need to think about because one day it could cause alot more problems.
I think I could have made the finishings on the bodice look a bit neater but I found it really hard because the fabric was so thick and this has made it look slightly untidy. I think if I had done alot more pressing this would have helped to tidy it up a bit.

Friday, 7 May 2010
Fitting
l
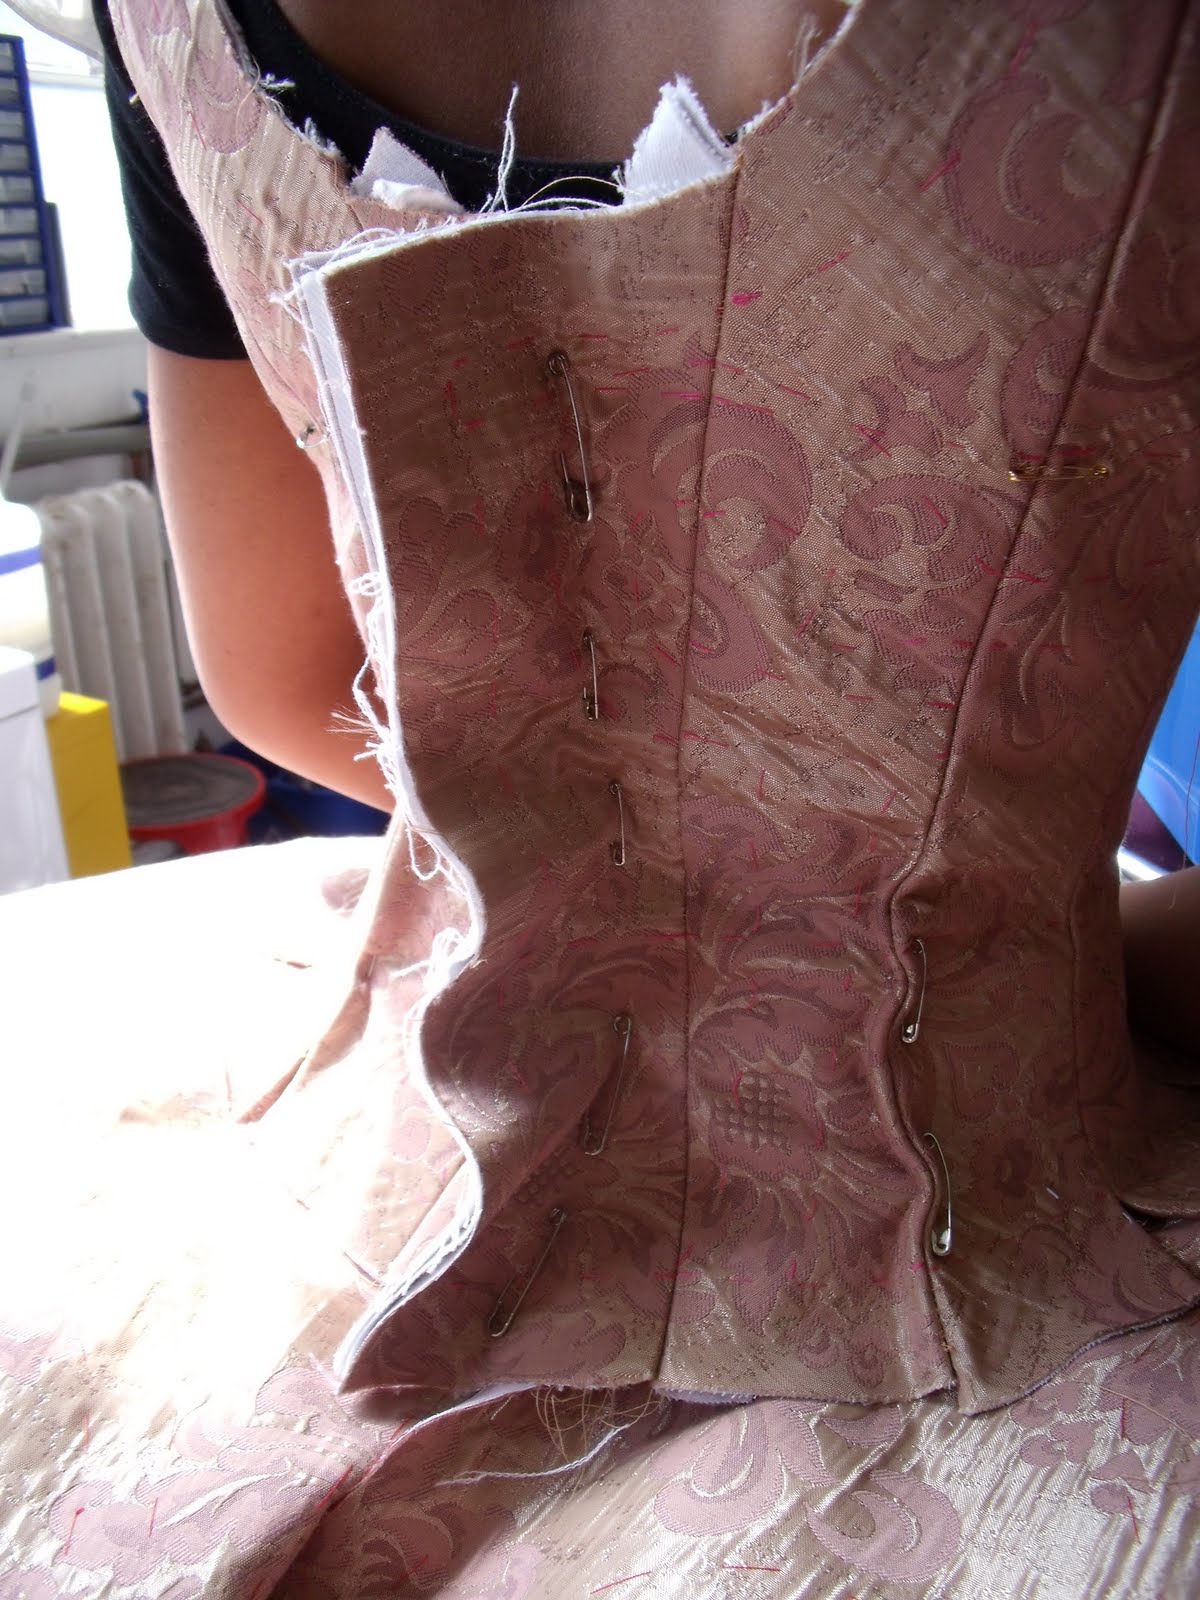
Seeing as we are making our tutus for Arts Ed in London, and we had to fit it around the dancers we were only able to have one fitting. When I turned up I was told that my dancer had dropped out and that I would have to fit my tutu to a new much smaller dancer. This was a bit daunting seeing as I only have a week to complete my tutu for hand in anyway and I was already nervous, but I got on with my fitting and after taking the time to make it fit the new dancer I realised that it wasn't as bad as I initially thought it would be.
Obviously seeing as my dancer was so much smaller than my original one I had to take the bodice in on the main seams, CF, SSF, SSB and CB. the amount taken off the CB was quite a lot so this will be distributed along with the SB seam. The Basque also had to have a dart put in which means I will have to re-do the waistband to fit the new measurement. The images below show my fitting.


I think that considering being told just before my fitting that my dancer had change, I coped quite well with the fitting overall. I tried to ensure that the dancer was comfortable throughout the whole process, and to get to know the dancer to make her feel more comfortable, I also tried to get the fitting done as quickly and as efficiently as possible without rushing so that she wasn't in the fitting for too long.
Overall I think my fitting went well, I just got on with what had to be altered. I found it quite difficult at first because in dancewear you use safety pins and the fabric was really thick as there was three layers to go through so it was hard to push the pin through. I had to have some assisstance with which seams to alter and which ones to leave but apart from that I knew which areas needed altering, such as the shoulder seam, changing the armhole, and the neckline.
Having a fitting with a client who is going to buy the costume taught me alot about working in this industry and how to work professionally, I had to travel to London to Arts Ed to be able to carry out the fitting with my dancer. This alone taught me how to cope with transporting a large costume from one place to another on public transport which could happen in the industry. I had to think about how to protect my costume, and be aware of everyone around me. It also made me think about how to look professional in front of the client so that they have confidence in me.
Sunday, 2 May 2010
Making the tutu plate
The plate for the tutu goes over the top of the actual tutu and is the decoration. My plate is the same fabric as the bodice so ties it all together, there is a net layer underneath this which is the net I dyed earlier. I learnt how to make the plate by cutting a hole in a piece of calico by using a sunray effect of cutting, the putting this over the mannequin with my tutu on it. I then could draw out the plate pattern piece. This method of creating the plate could be used as a way of drafting a quick skirt if I jut wanted a basic circular skirt so was a handy method to learn.
Once I had drafted the plate pattern I then used the example tutu to draw out the decoration on my pattern piece, I found this quite difficult because the two tutus were such different sizes but I learnt to manouver the pattern to make the decoration fit. This was useful to learn because if I ever have to re-make a costume with decoration on it I will know how to transfer the decoration so that it looks exactly the same even if the costume is slightly bigger or smaller.
I also learnt how to cut the net plate and top plate using my calico pattern, this was useful because if I ever need to make a skirt I will know how to use my pattern to cut out in top fabric by just lying the calico pattern over the top and cutting round, and with the net by laying the net on top of the pattern the tacking the waistline and hemline. This will be a much quicker way of making a simple circular skirt so will be useful.


Once I had drafted the plate pattern I then used the example tutu to draw out the decoration on my pattern piece, I found this quite difficult because the two tutus were such different sizes but I learnt to manouver the pattern to make the decoration fit. This was useful to learn because if I ever have to re-make a costume with decoration on it I will know how to transfer the decoration so that it looks exactly the same even if the costume is slightly bigger or smaller.

I also learnt how to cut the net plate and top plate using my calico pattern, this was useful because if I ever need to make a skirt I will know how to use my pattern to cut out in top fabric by just lying the calico pattern over the top and cutting round, and with the net by laying the net on top of the pattern the tacking the waistline and hemline. This will be a much quicker way of making a simple circular skirt so will be useful.

Thursday, 29 April 2010
Stringing the Tutu
Stringing a tutu is where you have to loosely sew the layers of the tutu together to make it lie as flat as possible, it compacts it together a bit more and stops it looking so fluffy. I didn't even know that a tutu had this but after stringing it I could see the difference it has made.
Another method I used to flatten the tutu was to lay it on a flat surface then put something heavy over the top of it, or you could put it under your matress and sleep on it. It is left for a few days then taken out, and this flattens it even more.
I think these two methods are quite specific to tutus so I don't know whether they will help me a massive amount with future projects but if I am working with lots of layers of net I have learnt a way to control it and make it lie how I want. I also now understand the tutu much more and how thy get them to lie flat like a pancake.
Thursday, 22 April 2010
Hooping the Tutu

On the 7th layer of net there is a hooping channel which is just a strip of net with a straight stitch either side, this should of been sewn on before the net was pleated but I didnt do this so had to struggle and sew it on when all the tutu was together. Once the channel was sewn on I then needed to push a piece of steel crin through the channel, this had to be exactly the right amount to make the tutu lie as flat as possible.


I really struggled with this and it was at this point that I was thinking "do I really want to do dancewear?" I spent ages pushing more crin in then taking more out then once I thought I had got it right and put it on the mannequin it didn't sit right so I had to try again. I think it was at this point that I started to question if this was what I really wanted to do because it frustrated me so much and it seemed that at every stage I had made a small mistake and had to go back, but then that has made me learn and with everything it will never go perfect first time. I'm still not 100% sure I want to go into dancewear I think I will know when I have the completed tutu in front of me. The images below show before the crin was right and after.


Wednesday, 21 April 2010
Midway Reflection
Overall I have enjoyed making a tutu, although there have been times when I have found it really stressful. I think that I have coped with everything very well, such as the mistakes with the bodice fabric wrinkling. I am happy with my tutu so far but think that if I had made one before I could of made it to a much better standard but seeing as it is the first time I have ever made one it has been quite difficult because everything is so new to me. I know that it is not perfect at this stage but it is to the best standard that I could have done. We have been having tutorials every week which I have found very useful because the timing seems to work well, we get told what to achieve over the week and so far I have been successful in doing this. It would have been nice to be more independent on this project but seeing as I have never made a tutu before this was the only way I could of achieved what I had done. Although I have not been completely dependent, for example with the dyeing it was our decision and I think we made good choices as the colours all work well. Also the pleating and hooping was completed to how I thought they should be and this worked in my favour because they were finished to a good standard.
I have enjoyed SDP because although I have had weekly tutorials I still have independence, it is up to me when I come in to uni and the hours that I work. I have been working to my timeplan as best I can and this has worked in my favour because throughout the project I have not got behind on work. I think it has prepared me for third year because I can see how independently we need to start working and I feel that I will cope with this well as I am quite organised and know how I work best. It has also prepared me because we have had to work so precisely and the costume has had to be perfect as it is for a client, so this has taught me to take time and ensure that every task I carry out is right before moving on.
I think that SDP has also taught me what it will be like to work for a client, the costume has to be perfect. For example having to undo the bodice because of the fabric wrinkling was because it was for a client, if this was just being handed in we probably would not of decided as a group to do this. I haven't had a fitting with my client yet but I think that I will learn alot more from this.
Saturday, 17 April 2010
Problem with the Bodice
After a long tutorial with my tutor we decided that the top fabric of the bodices did not look neat enough due to the type of fabric it had wrinkled quite badly after being sewn. Therefore we had to make the decision to undo the bodices completely and put interfacing between the drill and top fabric to make it lie smoother. This added another day of extra work onto what we already had to achieve but made me realise that when you have paying customers it has to be perfect and our bodices just weren't.
The images below show before and after putting an interfacing between the drill and top fabric.


The images below show before and after putting an interfacing between the drill and top fabric.


Friday, 16 April 2010
Making up the Bodice

Once drafted I could start cutting my bodice pattern out of my top fabric. It is backed in cotton drill. When cutting I had to be absolutely sure that everything was being cut on the right bias or straight of grain. I learnt a useful technique of cutting the pattern pieces which was after I had cut the cotton drill pieces to press them one at a time to the top fabric then pin and cut. This was effective because it ensured that the pattern piece was lying flat and just made it easier to cut around. This method will be useful for anything that I make that has to be backed.

Once all the pieces were cut I then had to tack the layers together, as I said earlier in my research in order to be more prepared to work in the industry I have to speed up and tacking is one thing I feel i need to do this. So when tacking I tried to speed myself up a bit which did help and made me realise it doesn't have to be perfect because it is going to eventually be removed anyway.
When it came to sewing my bodice together I learnt another useful tip for when making a bodice or corset which is to pin the pieces together so that each seam the pins heads will be facing opposite directions then when sewing the pieces together sew in the direction of the pins as this prevents the bodice from being distorted by the machine.
It is small tips like these which will help make me a more precise maker and perfect my skills.


Wednesday, 14 April 2010
Dyeing the Fabric

In a group tutorial we had decided on the colours we would dye our fabrics, these were: light pink and blue, dark pink and blue and lilac. We all decided on the colours we would be dyeing and started to dye the top fabric, viscose ( for decoration) and the top layer of net. After spending the most part of a day in the dye room we found that dyeing gold was not the easiest fabric to dye the colours we wanted, in the end lilac dye worked to create my colour which was the dark pink. Then the net had to be dyed numerous times to get it to match the pink in the gold fabric. We decided to scrap the viscose because it didn't match at all and would of just looked tacky.
When working in the dye room it make me realise how important communication is when working in a group because we helped each other so much to get the right colour which sped the process along, (hence how I found that lilac created the pink I wanted).
Tuesday, 13 April 2010
Drafting the Bodice

To draft a bodice for a tutu it is easierst to draft it on the stand pinning black tape to the mannequin becuase the lines of the seamlines is extremely important in flattering the body. After learning how to do this I started drafting my own bodice, making sure it was as flattering as possible, I could then pin calico over the top of my drafter pattern. This became the pattern pieces.
This was a really useful technique because it made the seamlines and the shape of the bodice on the body really clear. I enjoyed using this method and will definately use it in the future because it works well with how I personally find it easiest to pattern draft by seeing what I am going to make in 3D pattern form compared to the 2D method I have used before.
Due to the limited fittings available I didn't have to draft my bodice from scratch. I was able to use a bodice pattern and just alter it to fit my dancers measurements. This method is used in the industry to save time and was a useful method to learn for when I am limited on time.

Sunday, 28 March 2010
Making the Tutu

When cutting the net for the tutu I learnt a really useful technique, you use a tool which looks a bit like a pizza cutter and this is used for cutting net and other thin fabrics and basically you lay a ruler where you want to cut and slice next to the ruler. It is alot quicker than using scissors and with a fabric like net (which is cut on the fold) it stops it moving around as much. This will save me alot of time when I'm working with net or other sheer fabrics.
Another method I learnt was how to scallop the edges of a fabric which is to create a continuous pattern along the bottom edge. I made a pattern out of card then layed this along the bottom edge and cut using the pattern as a guide, this could be used in anything I do in the future if I want the bottom edge to be patterned but it can only be used on fabrics that do not fray such as net.
My tutu is having 12 layers and using a specific chart I had to cut different lengths for each layer. This took quite some time because I had to use two different types of net and it had to be cut carefully.
Once I had sewn all of the widths together I could then go on to pleating the layers. When doing this I learnt a very useful method of pleating which is instead of making and pinning the pleats before sewing to use a pin and push more or less net under to create the pleate and basically guess the pleate sizes. I can use this in the future if the pleating doesn't hav to be perfect or if there is a mad rush to get something done. This was the best way to pleate the tutu because it would of taken forever to measure it out.
Once it was all pleated the layers are attached to the knickers, I was surprised when I realised that the ballerinas where nothing under their tutus considering the knickers are made out of a sheer bra net but once I had sewn all the netting on it became clear that the netting covers everything up.


Sunday, 21 March 2010
Making the Waistband basque and knickers
After doing two weeks of work placement at Rainbow Productions I am back in Bournemouth. I have started the ballet workshops and this week have made the waistband, basque and the knickers for the tutu. The basque is what will attach the knickers and the bodice together to make it one whole piece. The tacking on the knickers shows where the netting for the tutu will be placed. My tutu will have twelve layers of net. The knickers are made out of a bra/bobbin net which is very soft as this is the only fabric used for the knickers so needs to be comfortable.
The group made a mistake when making the waistband sewing on the elastic wrong, so we had to make it again. By making it a second time I understand the whole process and why it is made the way it is. The images show the basque with the waisband attached and the knickers with the tacking lines.
The group made a mistake when making the waistband sewing on the elastic wrong, so we had to make it again. By making it a second time I understand the whole process and why it is made the way it is. The images show the basque with the waisband attached and the knickers with the tacking lines.
Tuesday, 16 March 2010
Initial Tutorial
Before making the tutu my tutor briefly went over the history, how we would be planning our time effectively to produce our tutus, briefly how long he expected us to take on each section of our tutus and a bit more information about our clients.
This was helpful becuase I got a much clearer understanding of what was expected of me for this project and how quickly I will need to be working. My tutor made it very clear that our clients were paying for the tutus we produce and that they must be made to a professional standard. I think that knowing the clients are paying will make me want to produce a pristine tutu that has been made to the highest standard possible. This will prepare me for next year knowing that the standard of my work needs to be pushed to the next level.
In this first tutorial I also found out that we will each be allocated different dancers who we already have the measurements for and that we will be having a fitting with our dancers one week before the tutus have to be completed. This has put the pressure on knowing that the tutus are being fitted to a dancer so have to be made carefully to the measurements we have been given. When researching the wardrobe mistress at Royal Birmingham Ballet said that they would usually have three fittings because the dancers weight is constantly changing so in a way this is more intense than the industry in the sense that we only have one fitting. This will prepare me for next year and working in the industry becuase I will see how I work under pressure and if I can cope.
Monday, 15 March 2010
Classical tutu research images cont.


In the last image you can see the channel put onto one of the frills for the crin steel the crin steel is there to help give the plate its shape.
Here are some more images of the Ice Queen tutu.


Research Images
After contacting the wardrobe mistress for the English National Ballet she kindly sent me close up photos of some of the tutus they have in their wardrobe. This gave me a much clearer understanding of what each section of the tutu is and how it is contructed. The photos are extremely clear and there are views of the inside, under the netting and the outside. This was very inspirational and gace me an aim to want to create a tutu as beautiful and pristinely contructed as the ones photographed.
I have gained a massive amount of information from contacting people in the industry and has made me realise that it is alot easier and less scary than I previously thought. I will take this on board for future projects because I now know how helpful it is and how responsive people in the industry actually are.
I will also use these methods in future projects (e.g e-mailing and phoning people in the industry) because it gives more depth to the research I am doing and a clearer understanding of what I am making.
The images that the wardrobe mistress sent are shown below she also sent some information along with these to make it clear what the photos are showing.
The tutu is from the ballet Raymonda, "The first picture is the full tutu, the bodice fabric is brocade generally a fabric which can be dyed is better because it is rare you actually find a fabric the designer likes the colour and the pattern at the same time. If you can find ready made motifs to decorate the better. The bodice is lined in cotton drill so the dancer can sweat into it.
There is a decent seam allowance so the tutu can be altered slightly as all the fabric stretches over time. Also in the picture you can see the basque, it goes round the waist and sits on the upper hip it keeps the bodice in place.


This is the bottom of the tutu with 9 layers of net totalling 11-13m of net all attached on to the knickers. There are many different types of net and nets can generally be dyed.


This is the topskirt, rules go like this: Corps de ballet - some decoration, Soloists- more decoration, Principal dancer- most decoration.
This is a Sleeping Beauty tutu you can see in this picture the bodice ends at the waits and goes into a point at the front. You can see the basque on this tutu. This is an old tutu it is about 17 years old, the rest of the production has been sold to another ballet company. This is an aurora tutu and was kept back together with an act II jacket for the prince.


You can see the boning inside the bodice to help keep it straight up and down, so it keeps its line most dancers dont like boning and tend to whip them out. You generally have 2-3 fittings for a tutu.


I have gained a massive amount of information from contacting people in the industry and has made me realise that it is alot easier and less scary than I previously thought. I will take this on board for future projects because I now know how helpful it is and how responsive people in the industry actually are.
I will also use these methods in future projects (e.g e-mailing and phoning people in the industry) because it gives more depth to the research I am doing and a clearer understanding of what I am making.
The images that the wardrobe mistress sent are shown below she also sent some information along with these to make it clear what the photos are showing.
The tutu is from the ballet Raymonda, "The first picture is the full tutu, the bodice fabric is brocade generally a fabric which can be dyed is better because it is rare you actually find a fabric the designer likes the colour and the pattern at the same time. If you can find ready made motifs to decorate the better. The bodice is lined in cotton drill so the dancer can sweat into it.

There is a decent seam allowance so the tutu can be altered slightly as all the fabric stretches over time. Also in the picture you can see the basque, it goes round the waist and sits on the upper hip it keeps the bodice in place.


This is the bottom of the tutu with 9 layers of net totalling 11-13m of net all attached on to the knickers. There are many different types of net and nets can generally be dyed.


This is the topskirt, rules go like this: Corps de ballet - some decoration, Soloists- more decoration, Principal dancer- most decoration.
This is a Sleeping Beauty tutu you can see in this picture the bodice ends at the waits and goes into a point at the front. You can see the basque on this tutu. This is an old tutu it is about 17 years old, the rest of the production has been sold to another ballet company. This is an aurora tutu and was kept back together with an act II jacket for the prince.


You can see the boning inside the bodice to help keep it straight up and down, so it keeps its line most dancers dont like boning and tend to whip them out. You generally have 2-3 fittings for a tutu.


Interview Research
I contacted the head of wardrobe at the Birmingham Royal Ballet, the wardrobe administrator at the English National Ballet through e-mail asking them some questions about the classical tutu and working in the professional environment. This was extremely helpful as they gave me an insight into what it is like to work in the industry, for example I found it fascinating that in general it takes 3 days to construct a whole tutu. The head of wardrobe at Birmingham Royal Ballet explained that on day 1 you would be expected to cut the basque, waistband, knickers and construct them all and also cut the widths of net. Day 2 you would shape the hem edge of the netting (scallop), join the edges of net together according to the layers, put in the gathering or pleating along the top edge, start applying the frills to the knickers, should get all frills onto knickers. Day 3 Put the knickers onto the basque, join the centre back seam of the knickers, join the crutch seam, put elastic into leg channels, join up centre back frills, stitch on waist and back fastening, put in steel into steel channels then string.
This puts it into perspective for me the speed that you have to work in the industry. It is obviously going to take me alot longer to make my tutu seeing as I have never made one before but as I am making it I will be able to think back to this and know how much longer I take compared to a professional. This has really made me realise that time is money. This has made me think about how I need to start working to prepare me for work in the industry and how to start speeding up the pace that I work.
This puts it into perspective for me the speed that you have to work in the industry. It is obviously going to take me alot longer to make my tutu seeing as I have never made one before but as I am making it I will be able to think back to this and know how much longer I take compared to a professional. This has really made me realise that time is money. This has made me think about how I need to start working to prepare me for work in the industry and how to start speeding up the pace that I work.
History of the Tutu Research
After researching the history of the classical tutu I read that it is used to flatter the dancers body lines and pose to their best advantage. This has given me the aim to make my tutu complement my dacers figure because it is important that it moves like a second skin with hers so the audience can see her every dance move.
Looking into the history of the classical tutu has broadened my knowledge of this area of dancewear and prepared me for my first tutorial. I feel I have gained som thorough initial understanding of how the tutu is constructed, all the different sections and generally how it works to complement the dancer.
Looking into the history of the classical tutu has broadened my knowledge of this area of dancewear and prepared me for my first tutorial. I feel I have gained som thorough initial understanding of how the tutu is constructed, all the different sections and generally how it works to complement the dancer.
Planning
To gain an understanding of how long I have to make my tutu and breakdown the amount of work involved I am going to do a detailed timeplan. This should help me keep myself organised and give me daily targets.
To help me gain more background knowledge on the classical tutu I am planning on going to see a ballet performance and hopefully get in contact with someone in the industry who can give me some initial information about the classical tutu.
To help me gain more background knowledge on the classical tutu I am planning on going to see a ballet performance and hopefully get in contact with someone in the industry who can give me some initial information about the classical tutu.
Friday, 19 February 2010
Initial Planning
The unit I am currently working on is 'Self Directed Project' at The Arts Unversity College in Bournemouth. This unit is all about each student choose which area of costume we want to broaden our knowledge in. As a maker, I have decided to take part in a set of ballet workshops, where I will be working in a group of five other makers. I choose this area as I have always had an interest in this aspect of dancewear.
Throughout these ballet workshops I will be learning the modern methods used in the workplace when making a classical tutu. At the end of this unit I plan to have a completed classical tutu, a research folder looking into the history of ballet and the costumes, and a workbook for my own personal future reference.
The classical tutu, I and the other makers in the ballet group produce, is being made specifically for dancers at Arts Ed in London. We will have fittings with the dancers and once the tutus are made, Arts Ed are buying these to go into their costume store for future performances.
Subscribe to:
Comments (Atom)